

ComfyUI を、クラウドのコンテナに設置する手順です。
関連
- ◯
- ComfyUI で画像生成 〜 なぜそこにつなぐのか:ComfyUI, Stable Diffusion
- ◯
- クラウドのコンテナでGPUを使う:GPC, Docker, nvidia-driver, cuda-toolkit
検証
- ◯
- サーバ
- ・
- クラウド:GCP
- ・
- コンテナ:Docker
- ・
- ホスト:Ubuntu 22.04
- ・
- ゲスト:Ubuntu 22.04
- ◯
- クライアント
- ・
- パソコン:macOS
概要
ComfyUI は、画像生成アプリのひとつです:
- ・
- https://github.com/comfyanonymous/ComfyUI
構成
ここでは、次の構成で、アプリを設置〜利用します:
- ・
- クラウドのコンテナに、アプリを設置
- ・
- パソコンのウェブブラウザから、設置したアプリに接続
設置
次の手順で設置します:
サーバ上で、プロジェクトのフォルダ群を作成し:
$ mkdir ${directory_configuration}
$ mkdir ${directory_project}
アプリのリポジトリを取得します:
$ cd ${directory_project}
$ git clone --depth=1 https://github.com/comfyanonymous/ComfyUI.git
$ mv ComfyUI ComfyUI_ver_${yyyy_mm_dd_nnn}
$ ln -s ComfyUI_ver_${yyyy_mm_dd_nnn} ComfyUI
コンテナの初期設定ファイルを作成し:
- ・
- ${directory_configuration}/Dockerfile
FROM ubuntu:22.04

RUN apt-get -y update
RUN apt-get -y upgrade
コンテンナのイメージを作成し:
$ docker build --no-cache -t ${image} ${directory_configuration}
$ docker commit ${container} ${image} # コミットする場合
コンテナを起動します:
$ docker run -it --rm --gpus all -v ${directory_project}:${directory_project} -p ${port_target}:8188 --name ${container} ${image}
コンテナで、ライブラリ群を設置します(適宜コミットします):
$ apt install python3
$ ln -s /usr/bin/python3 /usr/bin/python
$ apt install pip

$ pip install torch torchvision torchaudio --extra-index-url https://download.pytorch.org/whl/cu121
$ cd ${directory_project}/ComfyUI
$ pip install -r requirements.txt
利用
サーバのコンテナで、アプリを起動し:
$ cd ${directory_project}/ComfyUI
$ python main.py --listen --preview-method taesd
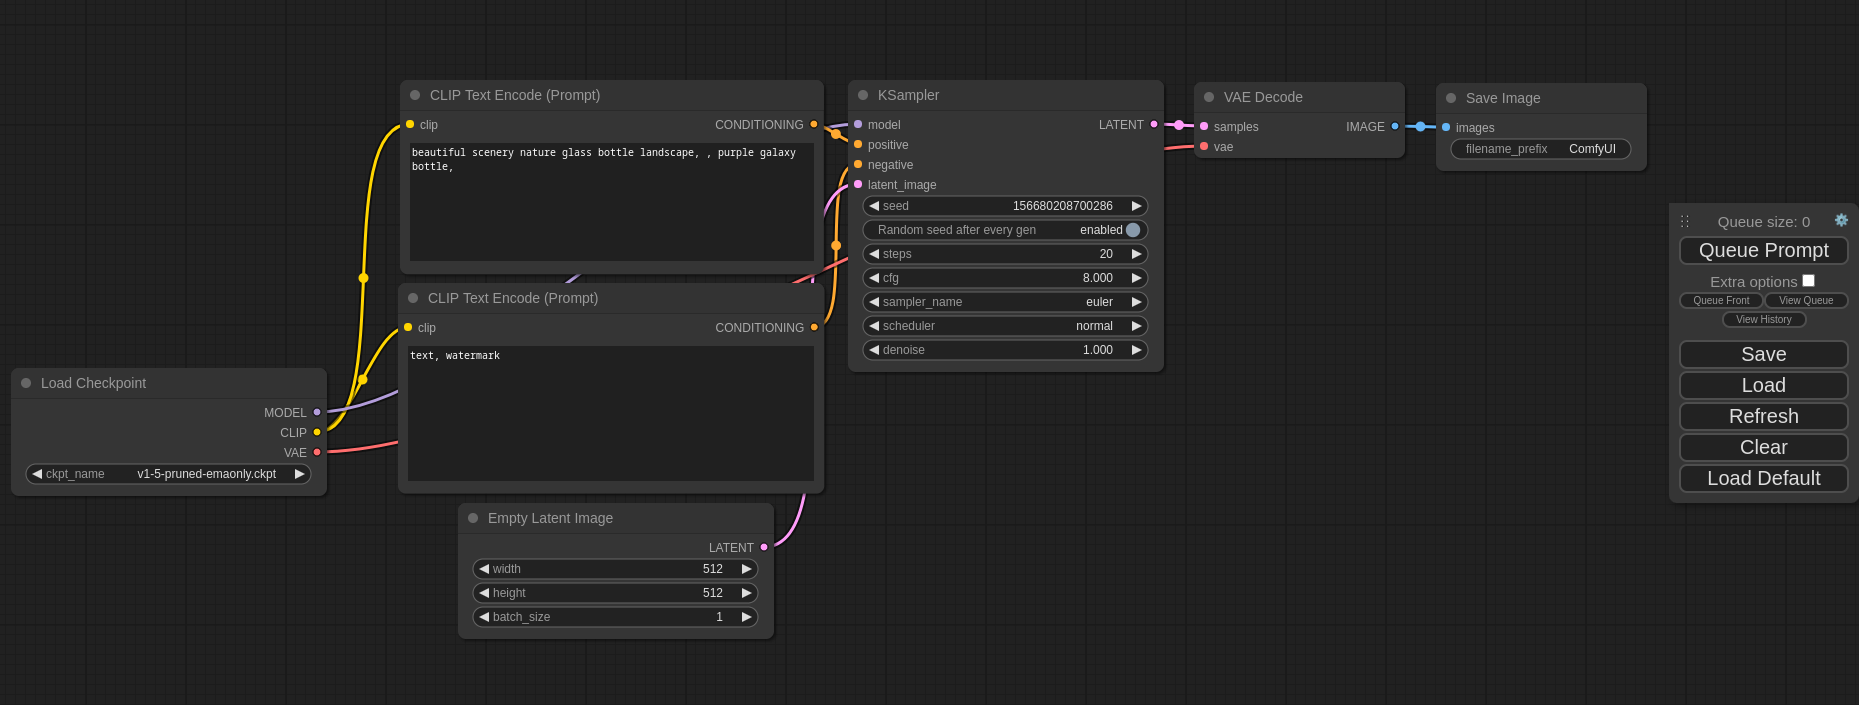
パソコンのウェブブラウザから、サーバのアドレスと指定したポートにアクセスします:[※1]
http://<address_server>:<port_target>/
- ※1
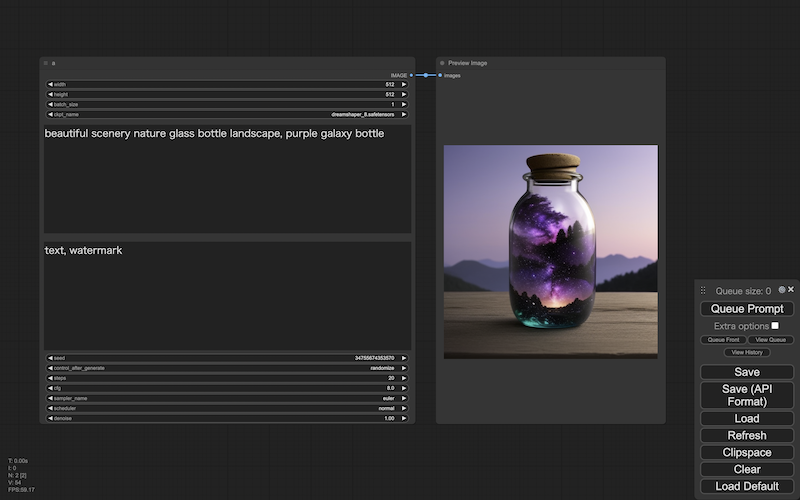
- ノードをグループにまとめることで、既定(Default)の画面を、次のようにシンプルにもできます:
- ・
- ComfyUI/web/user.css
.comfy-multiline-input {
  font-size: 20px;
}
> convert to group node
利用:拡張
主要なカスタムノード群は、次から検索できます:[※1]
- ・
- https://ltdrdata.github.io/
- ※1
- これは、ComfyUI Manager が管理しているカスタムノードの一覧です(この管理機能を使うかどうかは、自己判断で):
- ・
- https://github.com/ltdrdata/ComfyUI-Manager